17th Feb 2021
Increase Your ROI With Custom Stencils and Sandcarving
Increase your return on investment by combining the unique technologies of Ikonart's custom silkscreen stencils and the popular art of sandcarving. Here's a fun project that we did to honor and celebrate Valentine's Day.
How To Combine Ikonart Stencils with Sandcarving
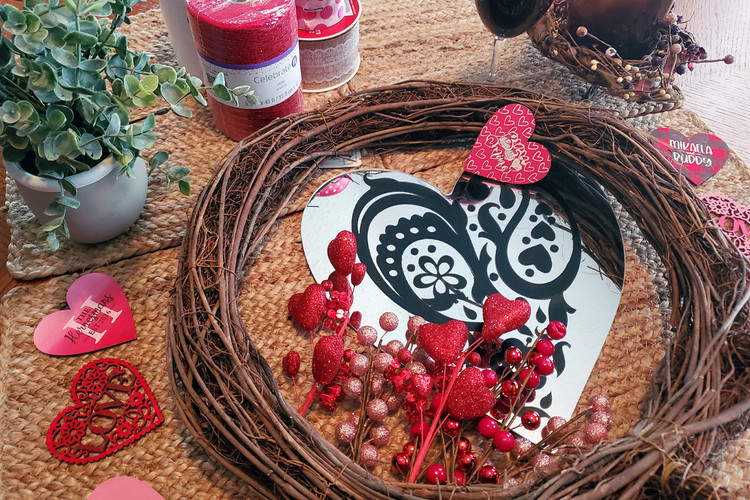
Marketing Manager, Mikaela Hernesman, has been working on perfecting these trendy ribbon wreaths that have been making an appearance more and more around the major holidays and boy did she nail this one! Read more to learn step-by-step how this wreath was made.
Step 1 - Creating Custom Graphics
Design your custom artwork, using a graphic design program such as: Adobe Illustrator, S3 Simple Sandcarve Software, or CorelDraw. Print out your vectorized design on AccuBlack Inkjet Printer Film or Ikonart Inkjet Printer Film, using the darkest black opaque settings possible and select "Glossy" as your paper setting. The more dense the ink, the better your exposure will turn out later.
TIP: For Ikonart ONLY - If using fine detailed text in your design, for best results mirror your text before printing (text so that it reads left and that letters are also facing to the left.)
Step 2 - Exposing Graphics to Film
Ikonart Artwork: Place one sheet of the Ikonart Stencil Film (blue or purple) on the base of the exposure stand with the textured side of the film facing up. Place your artwork on top of the Ikonart Film the way you want your final stencil to look (for example, if there is text on your design you should be able to read it). Place a clear exposure sheet (included in every Ikonart film pack) over the top of your artwork and rub down. You want your artwork to be sealed tight against your stencil film. Turn on the exposure light and expose for 35 seconds. Washout the textured side of the stencil film with a spray nozzle using warm water. Wash evenly until your mesh areas are completely clear. Dry completely before applying to wood hearts.
Sandcarving Artwork: Expose emulsion side of inkjet printer film to the dull side of the Ultra Pro 3 mil photoresist. Make sure the backside of the inkjet film is facing your light source. Remove the "scratchable" dull slip sheet and wash out film to reveal exposed design. Dry thoroughly before applying blastable application adhesive. *Adhesive is used to prevent scratches to the acrylic substrate.
Step 3 - Application
For Ikonart, the process is pretty simple. Remove shiny carrier sheet, but do not throw away. *You can reuse Ikonart stencil film. Apply the dry stencil film to the wooden hearts over the desired area. Sticky side should be facing the wooden substrate, while the textured side is facing you. Apply pressure and rub down your stencil.
After the blastable adhesive has dried to a clear state, apply photoresist to acrylic substrate in desired location. Firmly adhere film using a squeegee. Next, remove the shiny carrier sheet and then wire wheel to lightly perforate film membrane. Once the film in in place, tape off any exposed areas of the substrate to prevent any accidental sandcarve etching.
Step 4 - Sandcarving/Painting
To finish your wooden hearts, you can use any water-based inks or paste with the reusable stencils. Here are some great products that we suggest:
- Chalk Paste Trio
- Coco's Chalky Powder
Carefully, remove stencil, rinse and dry. Reapply the clear carrier sheet to reuse later. Let paint dry on the wood surface.
To etch the acrylic mirror, set your pressurized sandblast cabinet to 40 psi. Sandcarve for about 10 minutes to break through the membrane and blastable adhesive. Thoroughly remove any excess abrasive with a blow off gun or pressurized air nozzle. Wipe lightly with a lint-free cloth. Once your photoresist is clear of abrasive, spray your design with a quick drying spray paint. Art Primo has a wide variety of high quality spray paints. We suggest:
- Belton Molotow Premium
Let spray paint fully dry before removing the photoresist mask.
Step 5 - Assemble Wreath
Grapevine is a great choice for ribbon wreaths! I won't bore you with how to tie ribbon....because it's pretty self explanatory. The video is waaayy more fun to follow along with. Check it out! The only advice I'd offer is, cut your ribbons long enough:
Thick Mesh: 24" +
Thick Ribbon: 18"+
Thin Ribbon: 14"+
....and have a blast!!! All in all, supplies cost roughly $60-$70, but the end product could be marked up about 46% and retail for $140. These homemade wreaths are often sold via Wayfair and other commercial hobby stores both online and brick + mortar. We believe that adding the extra flair of sandcarving and high detailed stenciling have a higher valued benefit than other just plain ribbon wreaths. Give it a try and tell us how your project turned out!
Supplies List:
- 18" Grapevine Wreath
- 40 total yds. Various 'Wired' Ribbons 1.5" - 2.5"
- (2) 45 ft. Red & White Mesh (non-wired)
- (2-4) Wreath Décor Picks
- Acrylic Heart Mirror
- Wood Hearts
Other Ancillary Supplies
