18th Apr 2024
Blast & Color Fill Powder Coated Tumblers with Sandcarving
Customizing tumblers is an important part of the Personalization Industry. Customers are looking to personalize their powder coated tumbler with monograms, favorite quotes, logos and custom designs. Sandcarving tumblers is quick and easy and allows you to personalize tumblers that may be a bit tricky in a laser engraver.
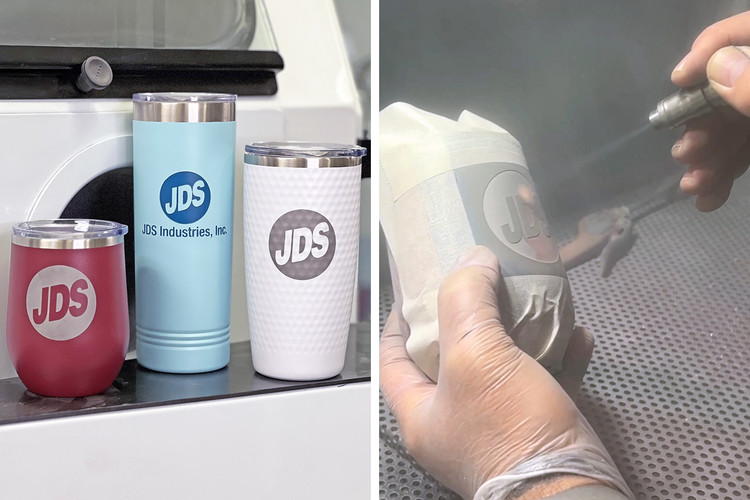
By combining the durability of powder coating with the intricate detailing of sandcarving, you can create truly stunning and personalized tumblers that are sure to impress. Whether you're making gifts for friends and family or adding custom merchandise to your business lineup, sandcarved powder coated tumblers offer endless possibilities for creativity and customization.

R5 Photoresist Film for Sandcarving Powder Coated Tumblers
R5 5mil photoresist film is part of our R-Series. The 5mil thickness is perfect for tumblers because they don't need a deep etch. R5 offers rapid washout and high detail carving, which is great when choosing which designs to sandcarve. R5 is also repositionable, if needed.
Powder coated tumblers are great for personalization, however some coatings can be harder to remove than others (depending on the tumbler brand as well as the coating color). Check out this video in which Peter Norman, Director of Sales for IKONICS Imaging, shows how to sandcarve and color fill a powder coated tumbler.
WATCH VIDEO: Personalize Powder Coated Tumblers with Sandcarving
Materials Needed For Sandcarving Powder Coated Tumblers
- Powder Coated Tumbler: Start with a powder coated tumbler in the color of your choice. The smooth surface of the powder coating provides an excellent surface for sandcarving, but keep in mind that some colors are more difficult to sandcarve.
- Sandcarver: We recommend using a high quality sandblaster for sandcarving powder coated tumblers, like one of our top-of-the-line CrystalBlast sandcarving machines.
- Design: Whether it's a custom logo, intricate pattern, or personalized message, you'll need a design to transfer onto your tumbler. This can be created digitally or hand-drawn, depending on your preference.
- Photoresist Film or Mask: To transfer your design onto the tumbler surface, you will need a photoresist film or mask to sandcarve your design on your tumbler. We recommend our R5 5mil R-Series Film. This is an adhesive washout film that requires no weeding of vinyl.

Steps To Sandcarve Your Powder Coated Tumbler
- Prepare Your Workspace: Set up your sandblasting equipment in a dedicated workspace with proper ventilation. All of the CrystalBlast sandcarvers come standard with our revolutionary CleanFlo Technology, making them the cleanest sandcarvers available on the market. This means there is no need to wear a mask or ventilator when blasting with a CrystalBlast machine.
- Prepare the Tumbler: Clean the surface of the tumbler thoroughly to remove any dust, dirt, or oils that may affect the adhesion of the stencil or masking material.
- Make the Mask: Print your design and expose it to your R5 film using an exposure unit. Then washout the film with a Washout Booth and the TriggerJet Nozzle, or an AquaBlast auto washout unit to reveal your stencil/mask. Air dry your mask or use a film dryer to speed up the process.
- Apply the Mask: Place your tumbler on a Smart Jig to stop it from rolling around, and carefully apply the mask/stencil to the surface of the tumbler using a plastic squeegee to help it adhere smoothly and securely without any gaps. Then use a Wire Wheel over the entire surface of the mask to ensure there are no air bubbles in your design, which can cause blow offs during blasting. Tape off any exposed areas of your tumbler with masking tape.
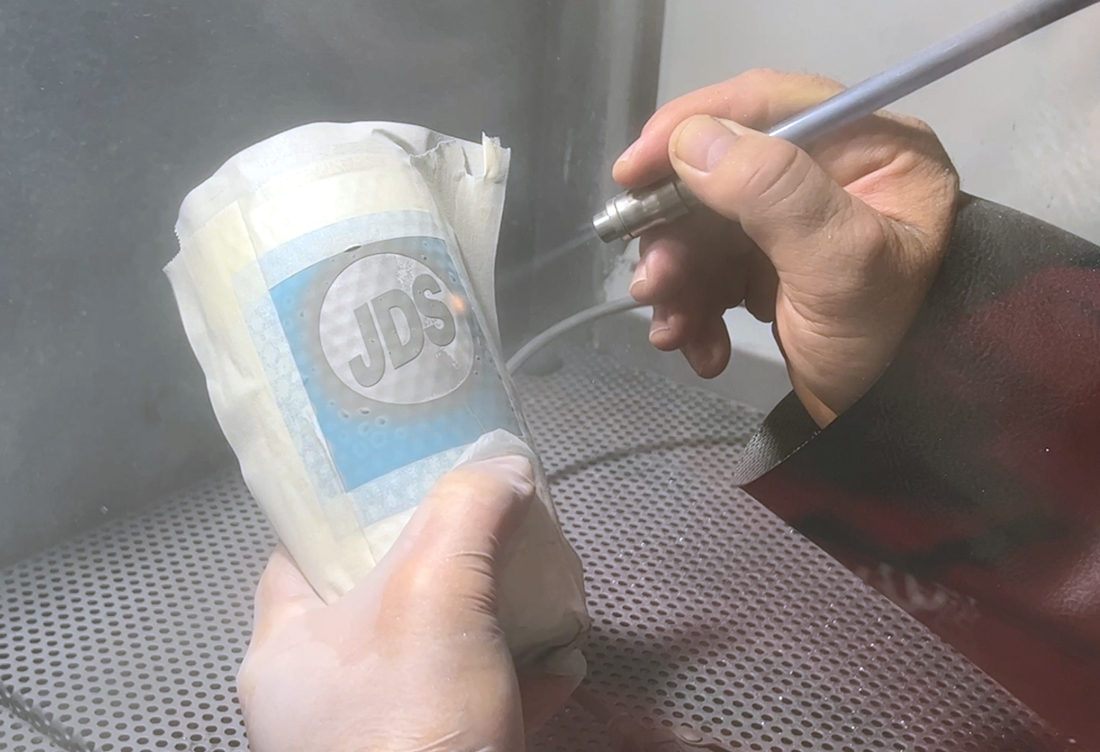
- Sandcarve the Design: With your sandblasting machine set to 40 PSI, carefully blast away your design using 150 silicon carbide, keeping your nozzle 6-8 inches away. Take your time and work slowly, adjusting the pressure and distance as needed to achieve the desired etch.
- Remove the Stencil: Once you've finished sandcarving the design, carefully remove the stencil or masking material from the tumbler surface. R5 should remove easily, but you can also run it under water to remove it if needed. You should be left with a crisp, etched design that contrasts beautifully with the powder coated background.
- Clean and Finish: Clean the tumbler once again to remove any remaining abrasive material or debris. Depending on your preferences, you can leave the sandcarved design as is for a matte finish, or you can further customize it by adding color fills or additional coatings for a more polished look.

Tips & Tricks on Blasting Powder Coated Tumblers
Here are some tips and tricks when blasting your powder coated tumblers:
- If your R5 photoresist film isn't tacky enough for your substrate, use a steamer to reactivate the adhesive
- Use a Smart Jig for easy mask application
- Blast at a slow and steady pace
- We recommend 150 silicon carbide, however 180 silicon carbide can be used but it will take much longer
- Sandcarving with silicon carbide will give your blasted image a matte finish (when the grit blasts away the powder coating, it also dulls the stainless steel); if you want your sandcarved design to remain shiny, you can blast with a plastic bead media instead of silicon carbide (however you will need a siphon machine for plastic media)
- Practice on a test tumbler before committing to your final piece
Contact IKONICS Imaging
These same tips will work on any brand of powder coated stainless steel tumbler including Yeti, Hydro Flask, Polar Camel, Pelican and more. For more information on how to sandcarve and color fill a powder coated tumbler, please contact IKONICS Imaging.
