9th Jul 2025
Create Halftones in Photoshop for Sandcarving
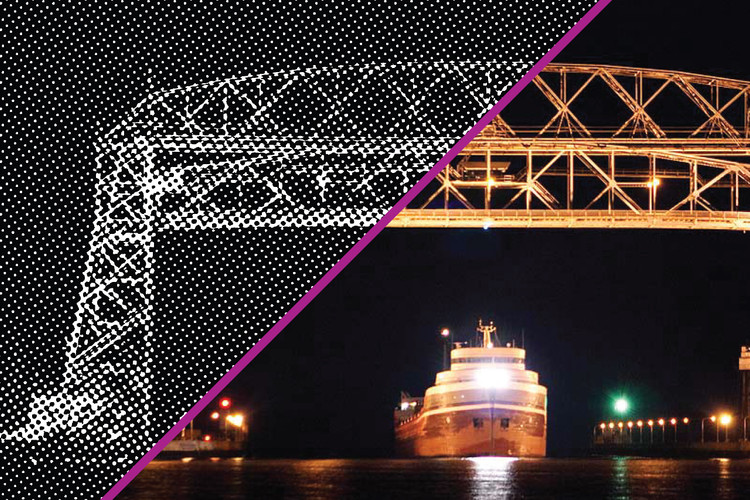
When it comes to sandcarving halftone images, successfully etched products are the result of quality artwork. Follow these steps and tips for how to create a halftone in Photoshop for sandcarving photographs onto glass and stone.
Create Halftone in Photoshop for Sandcarving
Follow along with the steps below to create a halftone in Photoshop that will make your final sandcarved piece look stunning.
1. Open Image: Open your image in Photoshop
2. Resize Image: Resize your image to the final sizing of your piece with resolution at 600 dpi
3. Convert to Greyscale: Make your image greyscale: Image-Mode-Greyscale
4. Adjust Levels: Go to Image-Adjustments-Levels. Change your output levels from 0 to 20 and 255 to 220 (also known as the 90-10 rule).
Note: Before adjusting the levels, you can use the eye dropper tool to check the whitest area (eyes, foreheads, lights, etc.) and darkest areas in your image. If the white areas are already in the 10-20 grey area range and the dark areas are in the 204-229 range, then you can skip adjusting the levels and move to step 5.
5. Convert to Bitmap: Make your image bitmapped: Image-Mode-Bitmap
6. Bitmap Options: Output: 600 pixels/inch / Method: Halftone screen
7. Frequency Options: Choose 35, 45 or 55. This is the sizing of the dots. Think of 35 as large, 45 as medium and 55 as small. Angle: 37.5 is standard, but every image is different. You do not want to see a checkered pattern (moiré) in your final image. Shape: Round
8. Inspect Halftone: Zoom in on your image to look at the dots and make sure all of the areas look good. Dots should not be connected in any way (for example, they should not look like a staircase). If they are, then start over and increase the resolution to 800 dpi in step 2 and try a different angle like 52 degrees in step 7.
Once all the dots look good, you are ready to print!
Tips For Creating a Halftone in Photoshop
- Size is IMPORTANT: You MUST scale or resize the image before the halftone process. Make sure the substrate size and exact sandcarving image size are known before you convert the image from grayscale to bitmap. After the halftone process has been applied to your image, scaling or resizing the image will ruin the halftone pattern.
- High Resolution: You want a large image, the higher the original resolution, the better your halftone will turn out.
- High Contrast: Find an image with high contrast. If your original image does not have a high contrast you can add this in Photoshop by adjusting the levels.
- Dodge/Burn Tool: If there are just one or two spots in your image that have pure white in them, you can use the Burn/Dodge tool to help you grey this area so that there will be no blow-outs. To do this, go to your left hand tool bar and the icon is a circle with a line coming out of the bottom left hand side of it. Dodge will lighten the area that you will click on and Burn will darken the area you click on. You can adjust the amount of Dodging and Burning on the top tool bar when you have this tool selected. By Dodging a white area in your image, you will make that spot grey, which will lessen blow-outs.
- White/Black Areas: You want your image to be as grey as possible for the best results. Zoom in on your halftone image and inspect. Dots should be seen across the entire image. If you see an area without dots, got back to step 4 and adjust the black and white settings further.
Tips for Sandcarving Halftones
When blasting halftones think of mowing your grass with a push lawn mower. Go slow, in straight line, and don't go back to hit the same area twice.
- Move your nozzle in a straight line and in the same pattern as your dots angle, if possible.
- The nozzle speed should be 1 square inch per second and overlap the next row by about ¼ at the most.
Best Photoresist Film to Use for Halftone Images
Our RapidMask HD film was engineered to hold high detail, making it the ideal choice for sandcarving halftones. This photoresist film does NOT require washout and has strong blast resistance, providing an effortless sandcarving experience.
Contact IKONICS Imaging
If you have any additional questions about sandcarving halftones, please contact our support team today.
