
18th Sep 2024
How to Apply Photoresist Film for Sandcarving
Applying photoresist film is a crucial step in achieving precise, detailed sandcarving results. Whether you're working with glass, stone, or metal, following the right process ensures your design is clean and free from imperfections.
At IKONICS Imaging, we offer a variety of photoresist films, ideal for creating beautiful etched designs. Here are some expert tips on applying photoresist film to your substrate, helping you avoid common mistakes and perfect your sandcarving project.
WATCH VIDEO: Top Benefits of RapidMask Dry Process Film (blast this Duluth Pack mug with us)
5 Steps To Flawless Photoresist Film Application for Sandcarving
Following these steps ensures that your mask adheres properly, preventing blowoffs and ensuring precise, clean lines in your sandcarving projects.
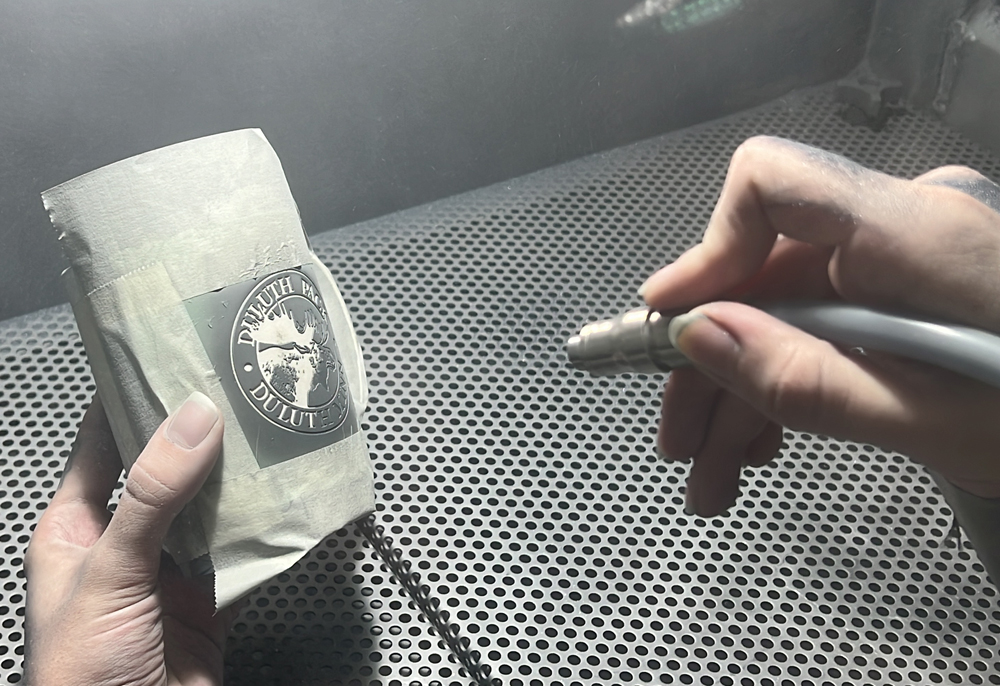
Step 1: Make Your Mask
Start by creating your mask using one of our high-quality IKONICS Imaging photoresist films. First expose your film using either the Letralite exposure unit or the Quick Image exposure unit. Then washout your film by hand using the TriggerJet Nozzle, or use one of our AquaBlast auto washout units. Ensure your mask is completely dry before proceeding. The film should be allowed to dry until it is one solid color. NOTE: If you are using our dry-process film, RapidMask, you will skip washout and drying.
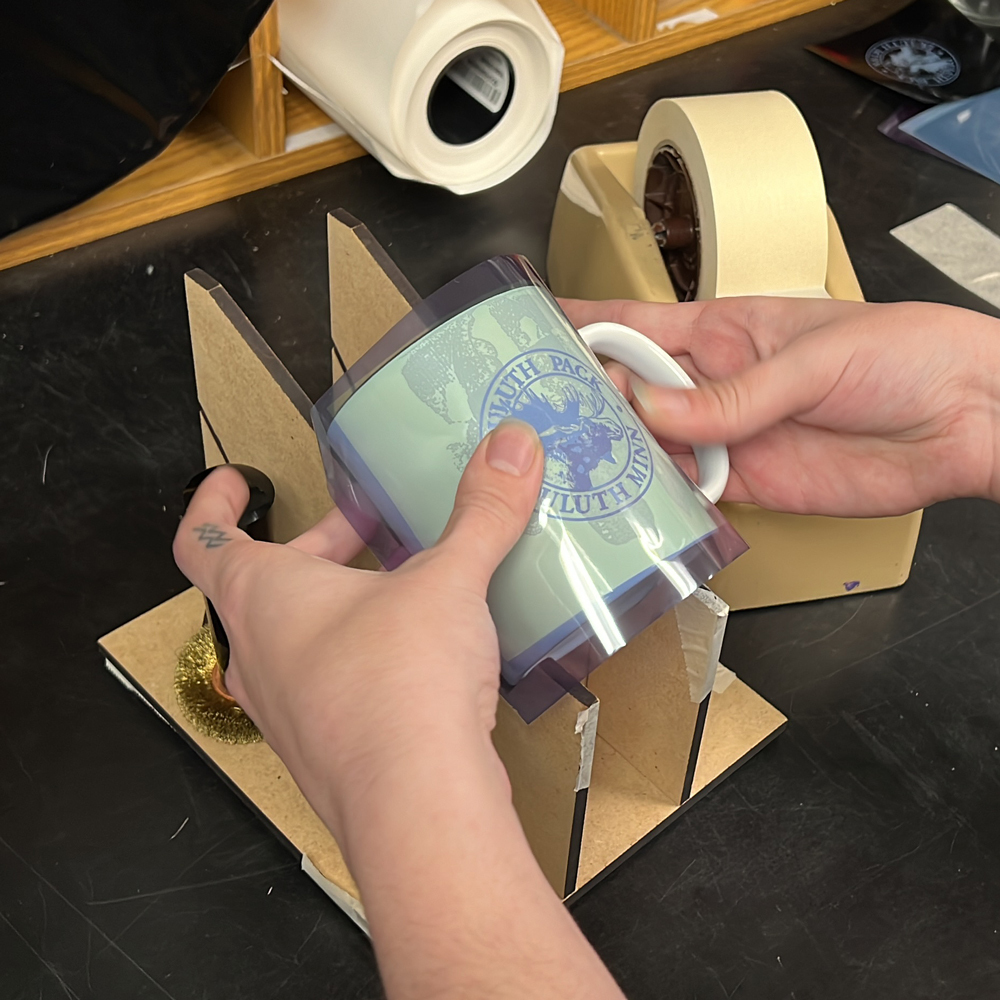
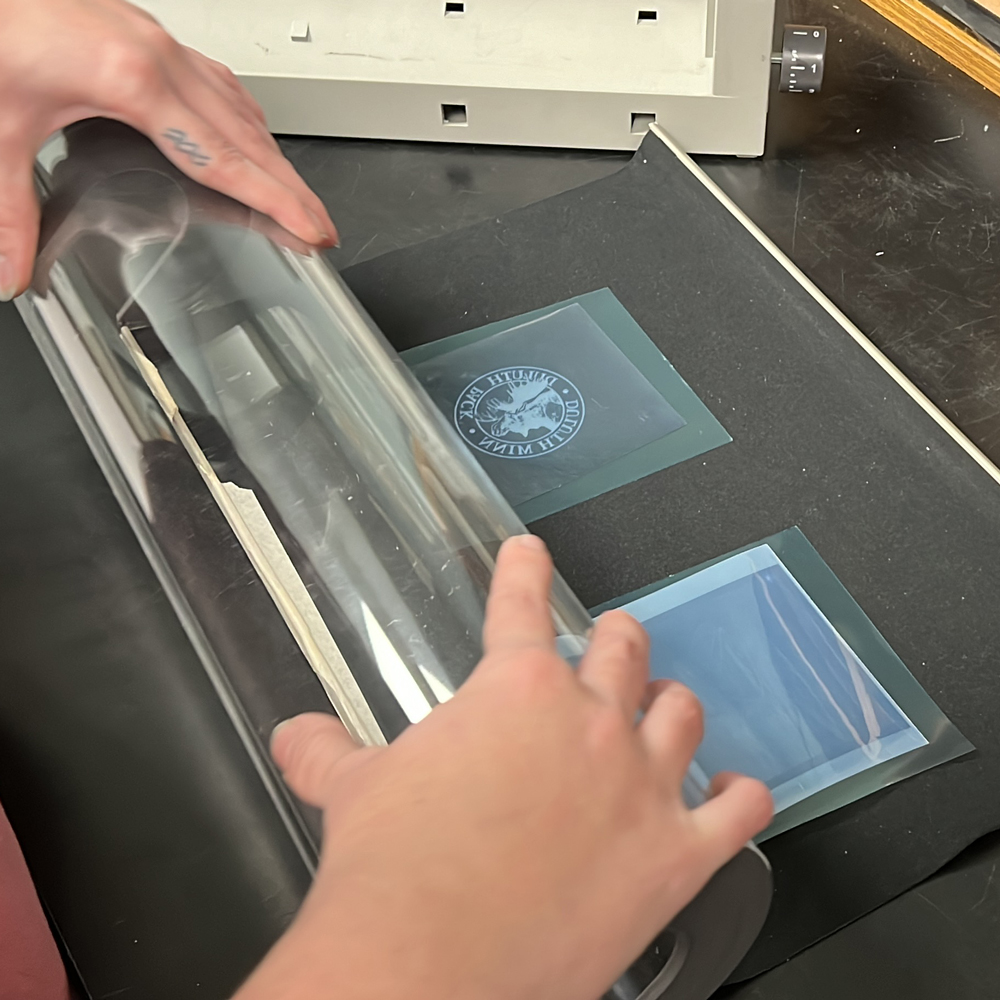
Step 2: Apply Your Mask to the Substrate
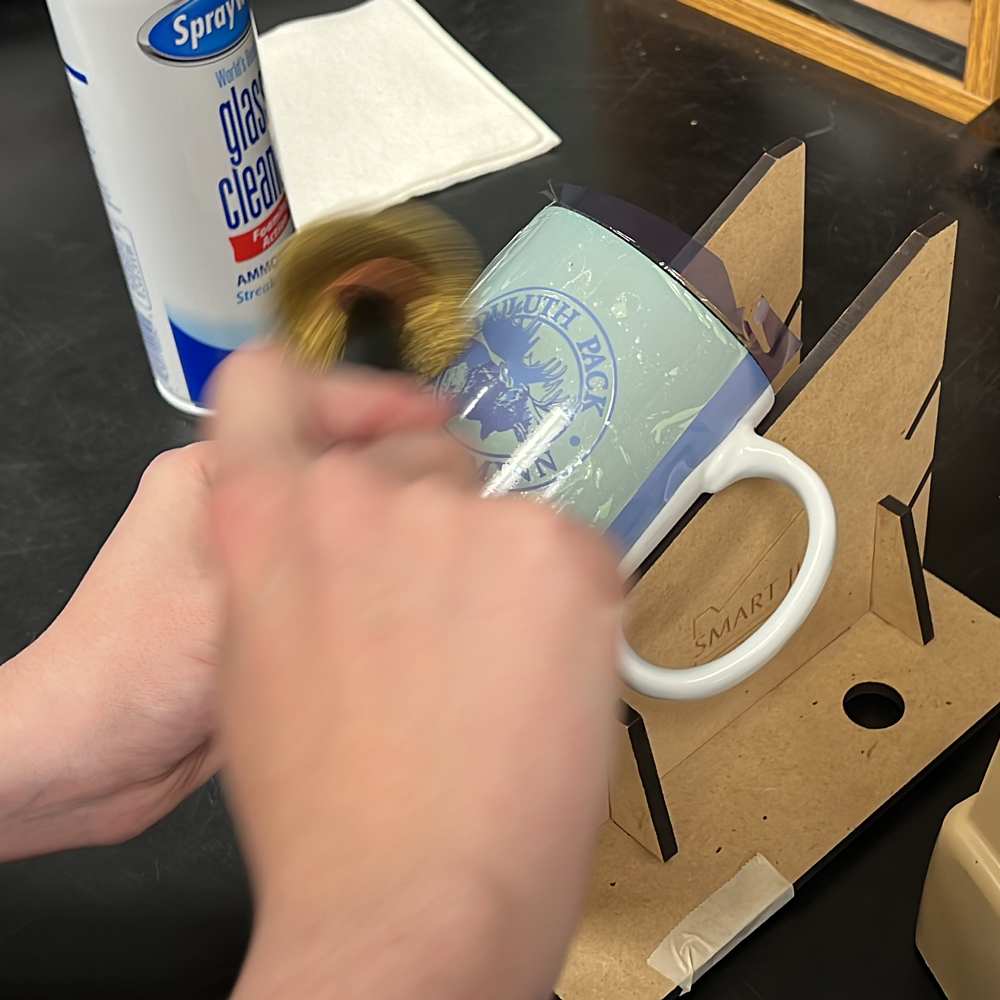
Once your mask is ready, carefully position it over your substrate, ensuring that the adhesive side of the film is touching the surface. Our photoresist films are respositionable, but avoid repositioning too many times, which can weaken the adhesive. If blasting glass or ceramic, make sure to clean your substrate first with glass cleaner.
With the mask in place, rub down firmly over the entire surface while the carrier sheet is still attached. This step ensures a strong bond between the mask and your substrate. Using the hard plastic IKONICS Imaging squeegee or a soft roller can help ensure even pressure, reducing the risk of bubbles or loose spots. We like to use the Smart Jig to hold our glass in place when applying film.
Step 3: Remove the Carrier Sheet
To remove the carrier sheet without disturbing the mask, flick one corner or use a small piece of tape to gently lift the edge of the sheet. Slowly peel it away, leaving the photoresist film securely in place.
Step 4: Eliminate Air Bubbles
Next, use a wire wheel over your entire design. This step is essential for ensuring there are no trapped air bubbles, which can cause blowoffs during blasting. A wire wheel provides the right amount of pressure to eliminate air pockets while keeping the film intact.
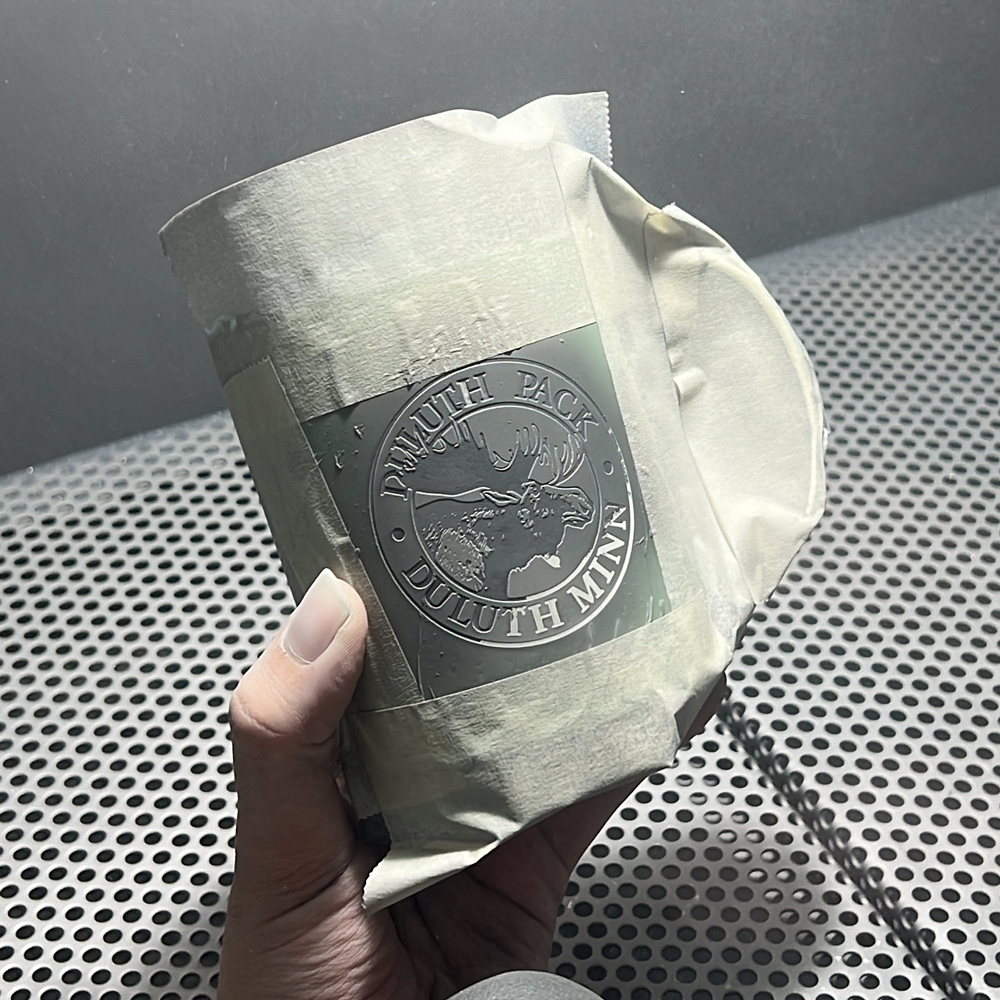
Step 5: Tape Off Your Design
Before sandcarving, tape off the areas surrounding your design to protect the substrate from any overspray during blasting. Use masking tape or another protective material to cover everything but the design itself. This helps keep your final product protected.
Choosing the Right Photoresist Film for Your Sandcarving Project
Now that your mask is securely in place and the substrate is taped off, you’re ready to begin sandblasting using your CrystalBlast Sandcarver. The mask will protect the substrate, allowing you to create beautiful, detailed designs with precision. Be sure to use the correct pressure and nozzle size based on your material to avoid damaging your substrate.
Choosing the right photoresist film depends on the intricacies of your design, the substrate you're working with, and the level of detail you want to achieve. Our thinner 2-3mil films are ideal for projects requiring fine detail and quick processing, as they adhere well to smooth surfaces and are easier to work with in short production runs. They’re perfect for delicate designs on glass or smaller items that demand precision.
For more robust applications, such as stone or metal, our thicker 4-10mil films like UltraPro offer enhanced durability and greater resistance to deeper carving. These films are also more suitable for large projects or when higher blasting pressures are needed to achieve significant depth. Understanding your project requirements will help you select the perfect film, ensuring excellent results and a professional finish.
Head to our blog post, Choosing The Right Photoresist Thickness, to download our film thickness cheat sheet.

At IKONICS Imaging, we are committed to providing high-quality products and support for all your sandcarving needs. If you’re new to sandcarving or looking for more advanced tips, our team is here to help guide you through the process. For more information on our photoresist films or other sandcarving supplies, contact the IKONICS Imaging team.